Curriculum 'User Guide Viedoc 4'
1 About the data export page
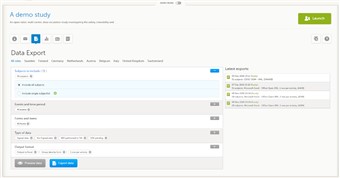
- The data export page enables you to review and download study data. There are two options:
• Preview
Using the preview feature, you can review the data directly on the screen, and generate different types of graphs from the data. It is also possible to directly access the underlying eCRF pages.
• Export
You can export the data to an external file for further analysis or archiving. Viedoc supports export of data to the following formats: Excel, CSV, SAS, PDF and CDISC ODM.
- You can filter the data by:
• Country and site
• Subjects
• Events and time period
• Forms and items
• Type of data
- This section describes how to filter and select data, and how to export them. For more information about the preview feature, see the eLearning section about Data preview.
2 Filter data for country and site
- You can filter the data for a specific country or site.
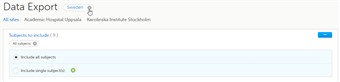
- To filter data for a specific country, click on the name of the country. The selected country appears in blue letters besides the Data Export header (see image).
- To filter data for a specific country, click on the name of the country. The selected country appears in blue letters besides the Data Export header (see image).
- To undo the selection of a country, click the cross (X) symbol beside the name of that country (see image).
To undo the selection of the site, click All sites.
- While filtering for country or site, the number of subjects depicted in between brackets in the Subjects to include field is updated accordingly (see image).
3 Subjects to include
- You can include all subjects in the data preview or export, or include a selection of subjects.
- To include data from single subjects, select Include single subject(s):, and click the + icon. Select the subject you would like to include from the drop-down menu. Selected subjects appear in the Subjects to include field.
If you would like to include multiple subjects, click the + icon again to select another subject.
- To undo the selection of certain subjects, click the - icon, or click the cross (X) behind the subject ID.
4 Events and time period

- You can filter the data for certain events. You can also filter for data that were added or edited during a certain time period.
- To include data from a specific event, select Single event(s): and click the + icon. Select the event you would like to include from the drop-down menu and click the + icon. Selected events appear in the Events and time period field.
- To include data from a specific time period, follow the steps below:
| 1. |
Select the Time period checkbox. |
| 2. |
Select one of the following options:
• Edited (UTC)* to include data based on the date they were added or edited.
• Event date to include data based on the event date. |
| 3. |
Select whether to define the time period until a certain date, from a certain date, or between two dates. |
| 4. |
Select the date(s). |
*This feature includes data based on Coordinated Universal Time, not on the local time a user has added or edited data. Note that also the time period should be specified in UTC.
- Tip! Filtering for data that were added or edited since a specific date is especially useful if you want to see all new and changed data since for example your last monitoring visit.
- To undo the selection of events or time periods, click the red - icon (to remove selected events), or click the cross (X) behind the event name or time period.
5 Forms and items
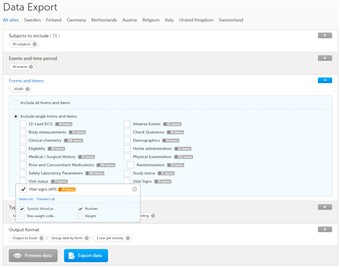
- You can filter the data for specific forms or items.
- To include data from a specific form, select Include single forms and items:, and select the forms that you would like to include.
- You can also include or exclude specific items of a selected form. Click the field [..]/[..] items behind the form name, and select or deselect all or specific items. By default, the system includes all items in a selected form.
- To undo the selection of certain forms, click the cross (X) behind the form name.
- Only the data added under the latest effective design version will be included in the export.
6 Type of data
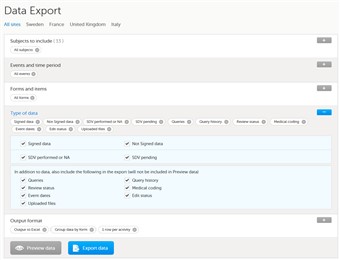
- You can filter the data for their status:
• Signed or not signed
• SDV performed or SDV pending
- Depending on the format you would like to export to, you can also include the following information in the export:
• Queries
• Review status
• Event dates
• Query history
• Medical coding
• Edit status
• Uploaded files
This information is not available for all export formats. The table below gives an overview of which type of data is available for which export format:
| Type of data |
Export to Excel? |
Export to CSV? |
Export to PDF? |
Export to ODM? |
| Queries |
Yes |
Yes |
No |
Yes |
| Review status |
Yes |
Yes |
Yes |
Yes |
| Event dates |
Yes |
Yes |
No |
Yes |
| Query history |
Yes |
Yes |
No |
Yes* |
| Medical coding |
Yes |
Yes |
No |
Yes |
| Edit status |
Yes |
Yes |
Visible in audit trail |
Yes |
| Uploaded files |
Yes |
Yes |
Visible in audit trail |
Yes |
*When choosing export to ODM format, query history is not optional, but will be included regardless. For this reason, query history is not displayed as an option.
- When including event dates in the export to Excel, an "Event dates" sheet that lists all events with the following information is created in the Excel file:
• Date the visit was initiated
• Name of the user who initiated the event
• Date of last edit
• Name of the user who last edited the event
• The design version or revision that is active for the event.
- When including the edit status in the export to Excel, columns that contain the following information about each form are added to the data sheets:
• Date the form was initiated
• Name of the user who initiated the form
• Date of last edit
• Name of the user who last edited the form
- For more details about how the uploaded files are exported to different formats, see section 8. Uploaded files in the export output below.
7 Output format and export
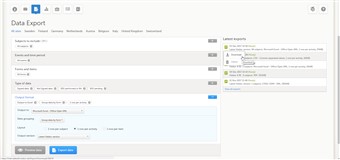
- You can export the data to Excel, CSV, PDF or CDISC ODM. For export to SAS, select CSV as output format.
- For export to Excel or CSV:
• select whether the data should be grouped by form or not. When grouping the data by form, a separate sheet is created for each form.
• select whether the data should be organized as one row per subject or one row per activity.
For export to CSV: select whether to include the corresponding SAS script. When the option to include the SAS script is activated, a compressed zip archive is created that contains study data files and script files. This script is used when importing data into SAS.
- For export to PDF, select whether deleted subjects, events and forms should be excluded from the PDF export.
- For export to CDISC ODM, select whether Viedoc extensions should be included in the export.
- To export the data, click Export data. An export file is created and appears at the top of the list of latest exports (see image). Point to the file and click Download to download the file.
Note! Data export of a study with many events, forms and data can take some time. A progress indicator indicates the progress of the export (in percentage). Do not start a new export while waiting for one export to complete, this will only prolong the export time.
- You can also review the data in Viedoc using the preview feature. For more information about the preview feature, see the eLearning section about Data preview.
8 Uploaded files in the export output
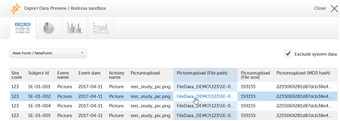
- The export output (Excel, PDF, CSV, ODM and Data Preview) provides information about uploaded files, as follows:
• File Name
• File Size (in bytes)
• File Hash
• Path to where the actual file is located in the exported .zip file - If the Uploaded files option is checked under the Type of data section (see 6. Type of data section above), the uploaded file together with the thumbnail (if it exists) are part of the Excel, CSV and PDF export output:
• Excel The export file (.xls) together with all the referenced file uploads are included in a zip file.
• CSV, PDF A folder with all the referenced file uploads is included in the export zip file. - The following information on the uploaded file is available in the audit trail:
• Who has uploaded the file
• Upload date
• Initial/Updated (first file uploaded/update of an existing file)
• File Name
• File Size (in bytes)
• File Hash (MD5)
• Link to file
Was this information helpful?